Docker is a definitely good way to deliver and deploy software pieces, expecially when we face the Cloud. The fact that deployments are at the same time perfectly reproducible and easily portable is key strenght of the Docker ecosystem. But as soon as requirements grow complex, infrastructure must grow too.
One of the key points to solve in container based deployments is the provision of the images. Docker allows to build and copy images around in compressed format as well as to build them in place, but when you deploy to a cluster both these strategies become pointless soon, as you want neither to waste minutes building your images nor to copy (via ssh) gigabytes of data. The right solution to distribute images is to rely on a registry: you build images once, push them to registry and every time you need you just pull them back again.
The most famous registry is for sure the Docker Hub, which hosts the vast majority of publicly available images. The good thing about the registry is that Docker itself provides the registry implementation (not surprisingly, as a docker image), so that companies can host it in their infrastructure for free.
The provided implementation is, however, limited to its main task: storing and distributing images. This means for instance that it lacks a user interface to browse the available images and tags.
Talking about security (both in terms of authentication and authorization), the registry implementation supports three alternative configurations:
- public (unauthenticated) registry
- basic authentication
- token authentication
The first two ways are pretty self explanatory, while the last needs some comment. Token authentication means that the registry will allow or deny operations by inspecting a proper JWT, whose signature is verified against an SSL certificate. The management of users and permissions and the process of forging such a token are not in charge of the registry.
Despite this, token authentication is ways more powerful and secure with respect to the other options, as it allows finer control of permissions and relies on strong cryptographic primitives. No surprise that the market offers plenty of (costly) solutions to deploy token-secured docker registries.
At Inmagik we tought to fill this gap by building Registryo, an open source tool to both surf the registry and secure it.
Registryo aims at filling the gap to bring the official docker registry implementation into daily development process. In particular, it allows to
- browse the content of the registry, seeing images, tags and metadata
- manage a user base that can access the registry in perform some kind of operation
- create service accounts for automated builds or automated deployments
I'm sure you already guessed it, Registryo is available as a docker container (you can find it on DockerHub). Source code is public and available on our GitHub
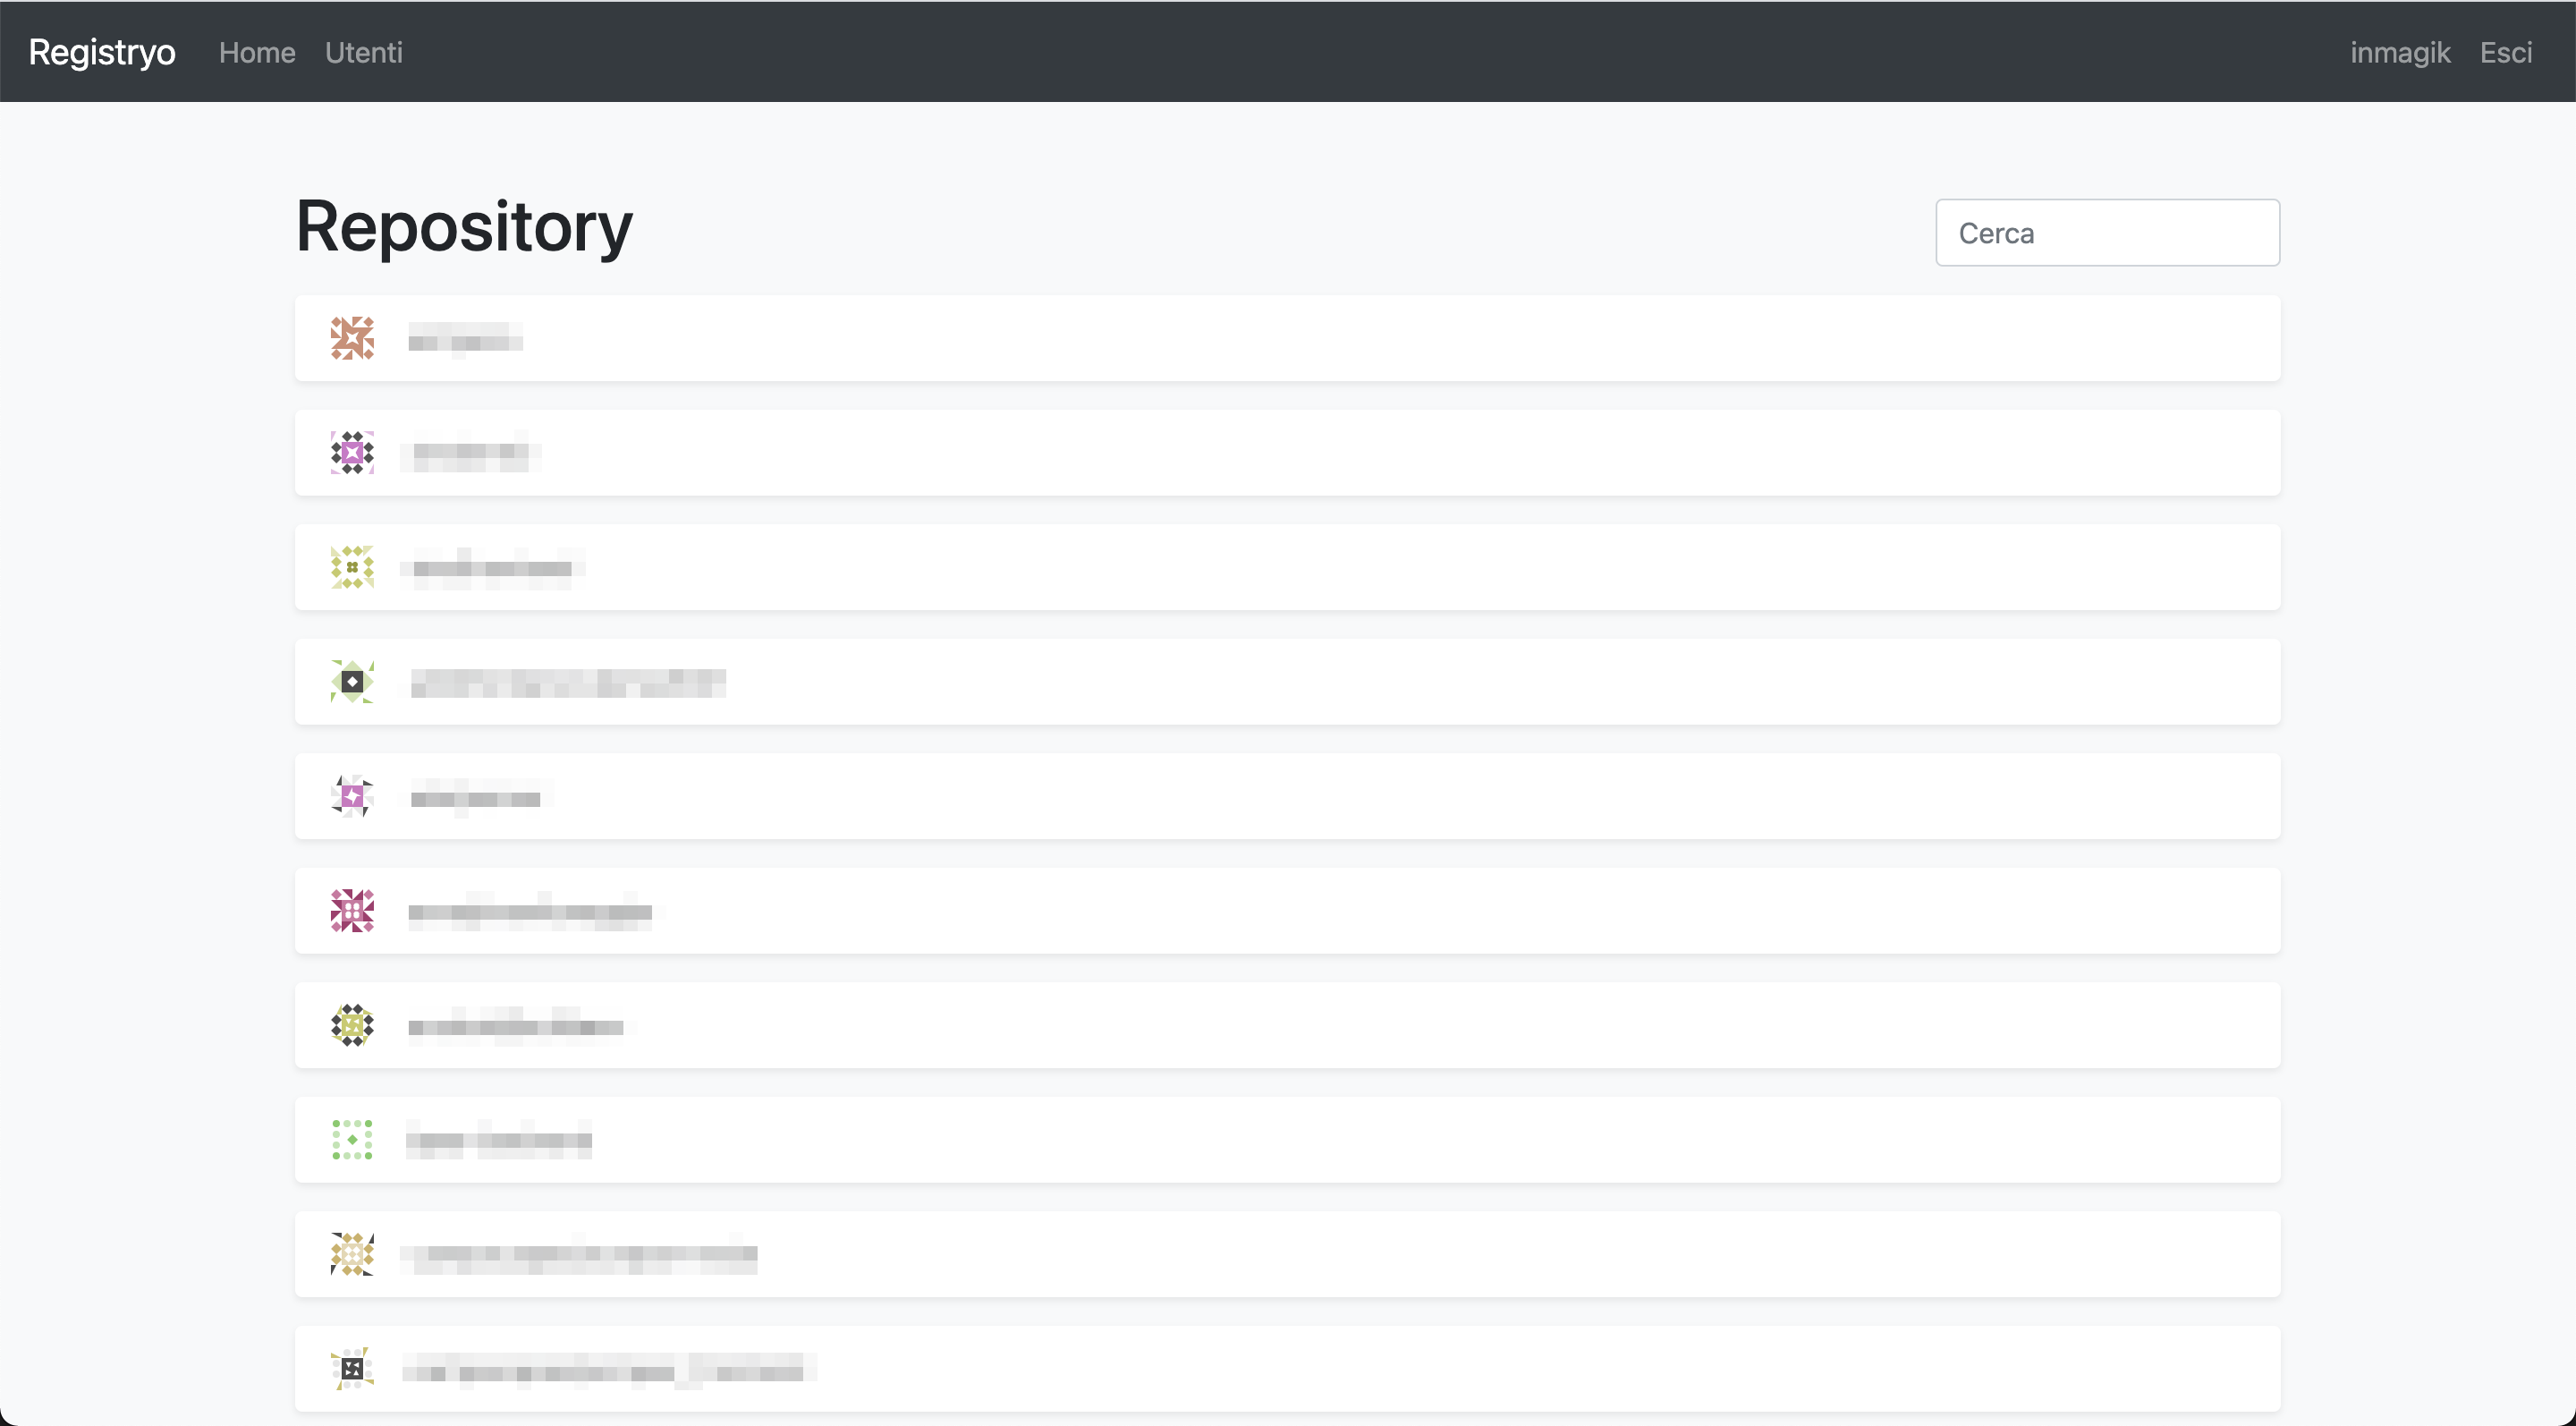
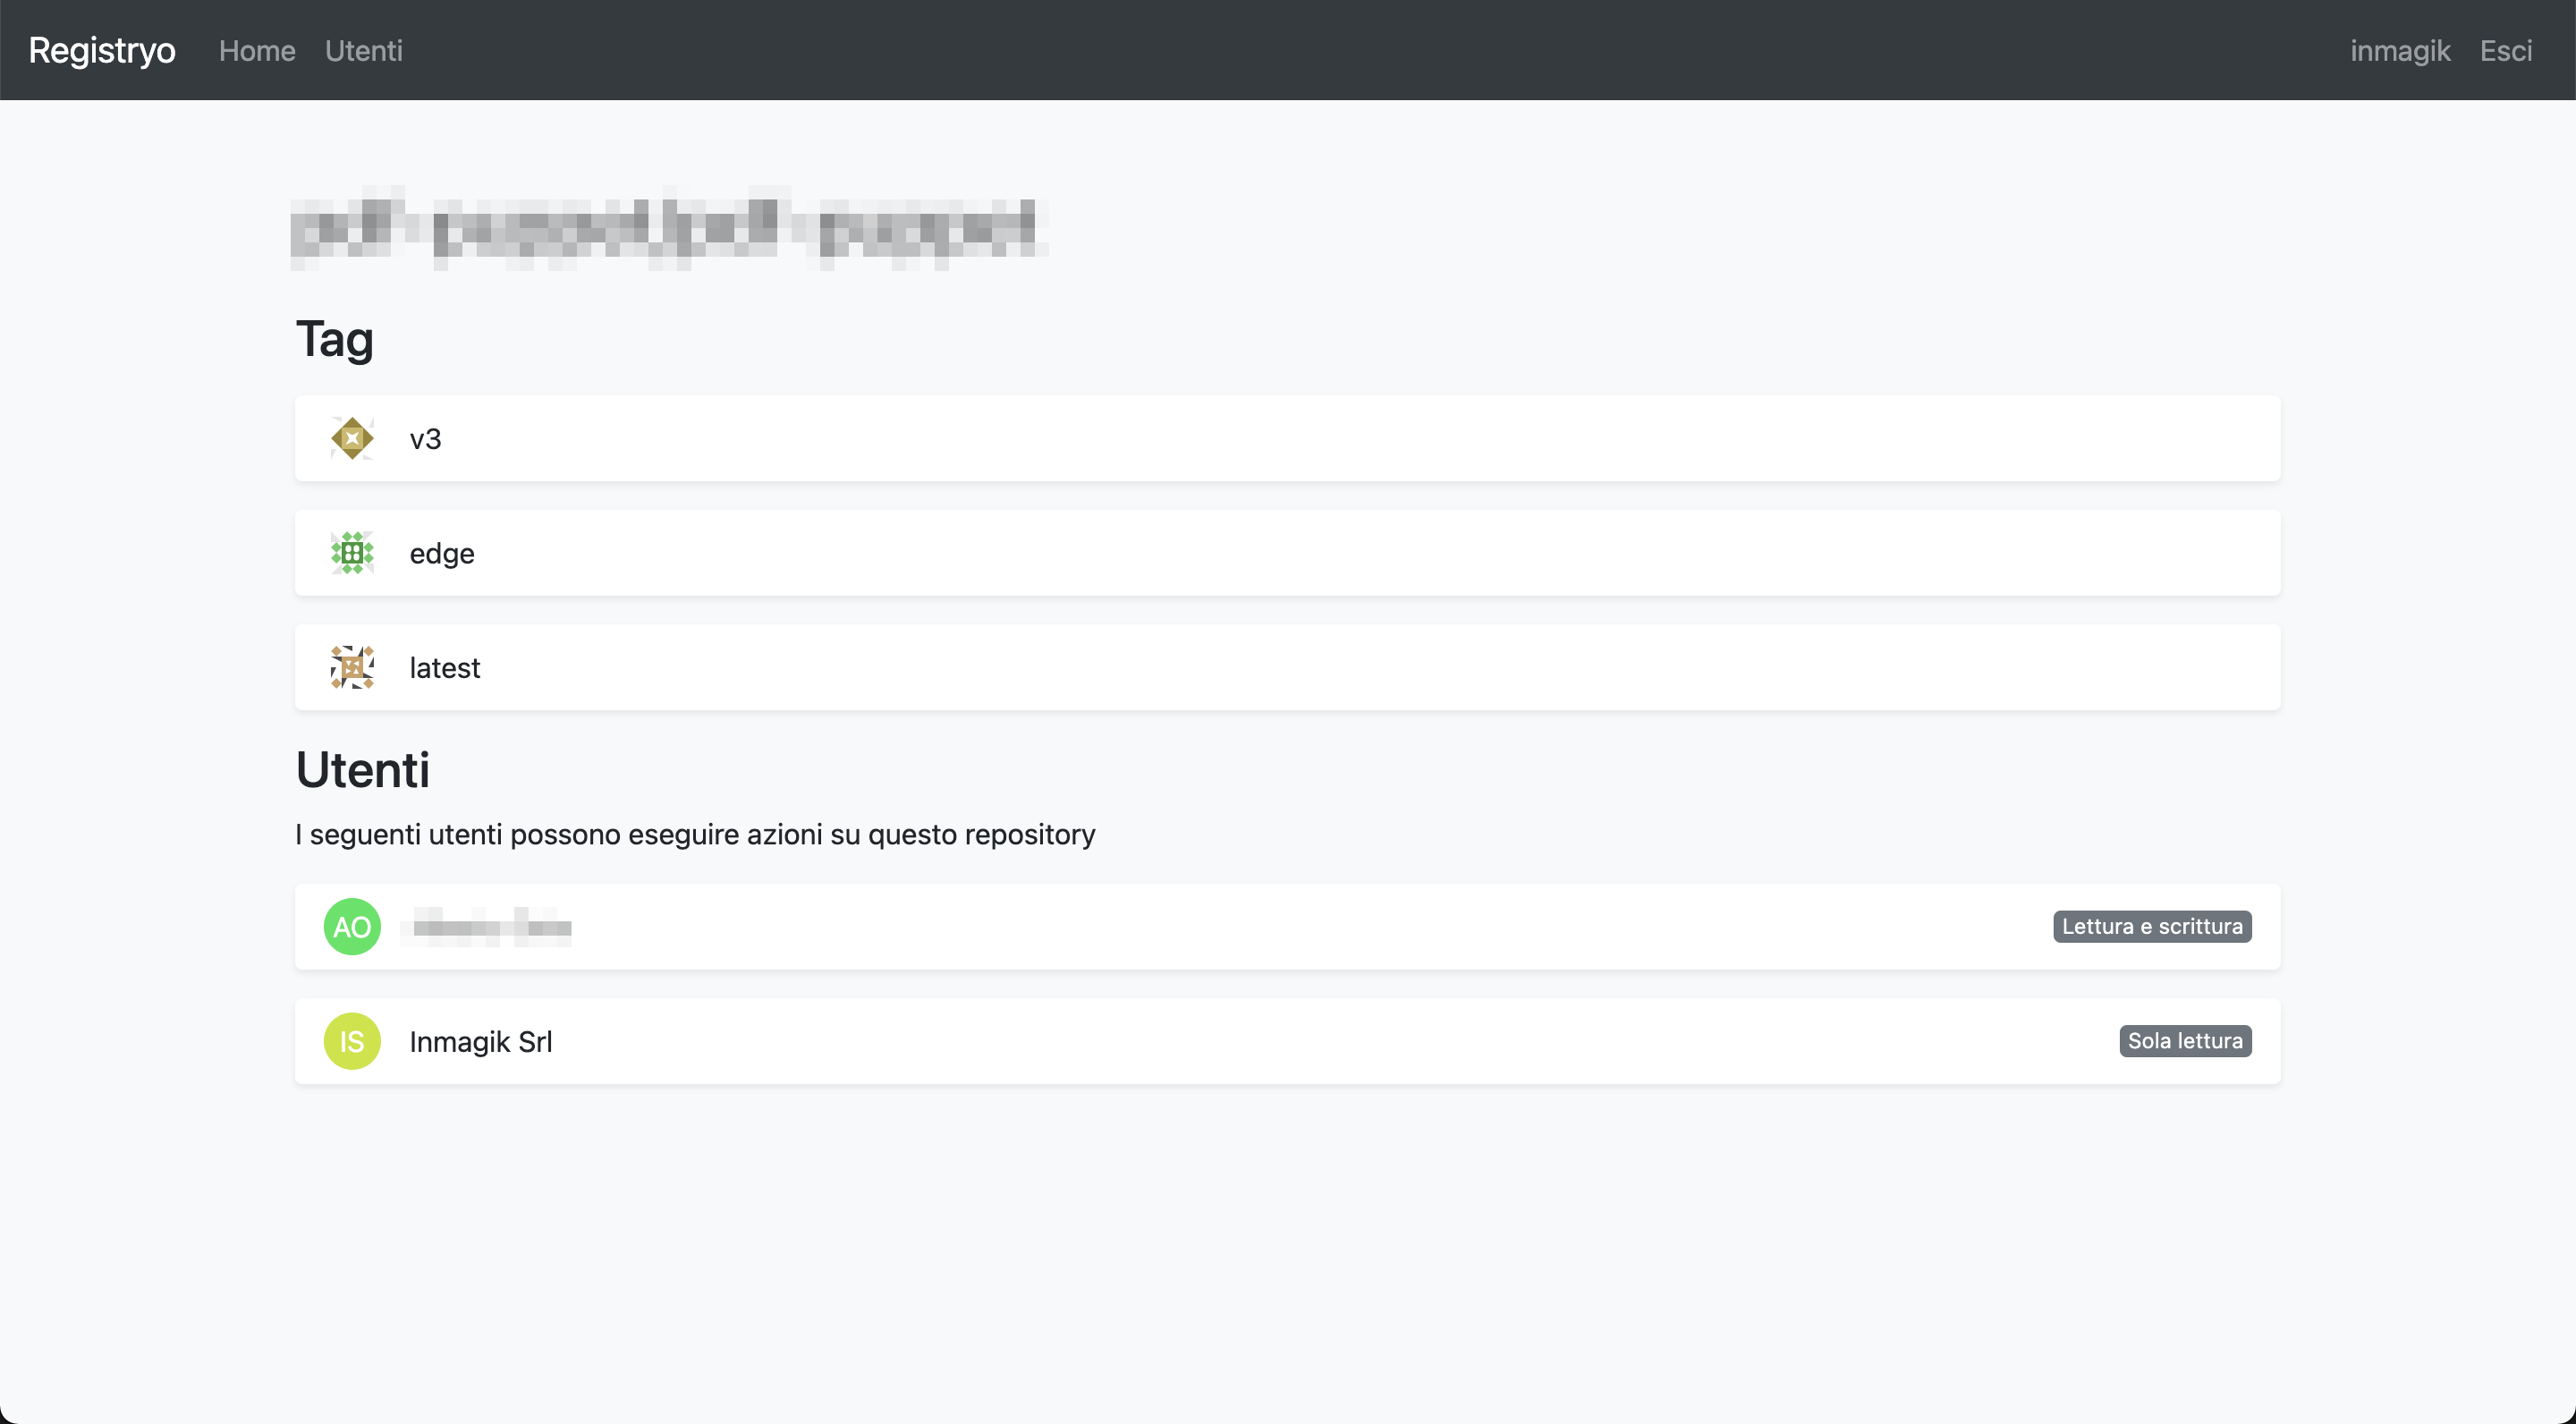
Surfing the registry
Images are organized in repositories basing on how they are tagged: if you push an imaged tagged registry.example.com/my/custom/repository:tag, it will be stored on a registry deployed to registry.example.com in repository my/custom/repository under the tag tag. The UI provides a way to see all the repository and, for each repository, all the available tags. It also allows to inspect some metadata about the image pointed to by each tag, such as the number of layers, its compressed size or the instructions used to build it.
Furthermore, the detail page of each repository displays the list of all users that can perform pull, push or both actions on it. This means that checking the correctness of your authorizations is a breeze.
User management
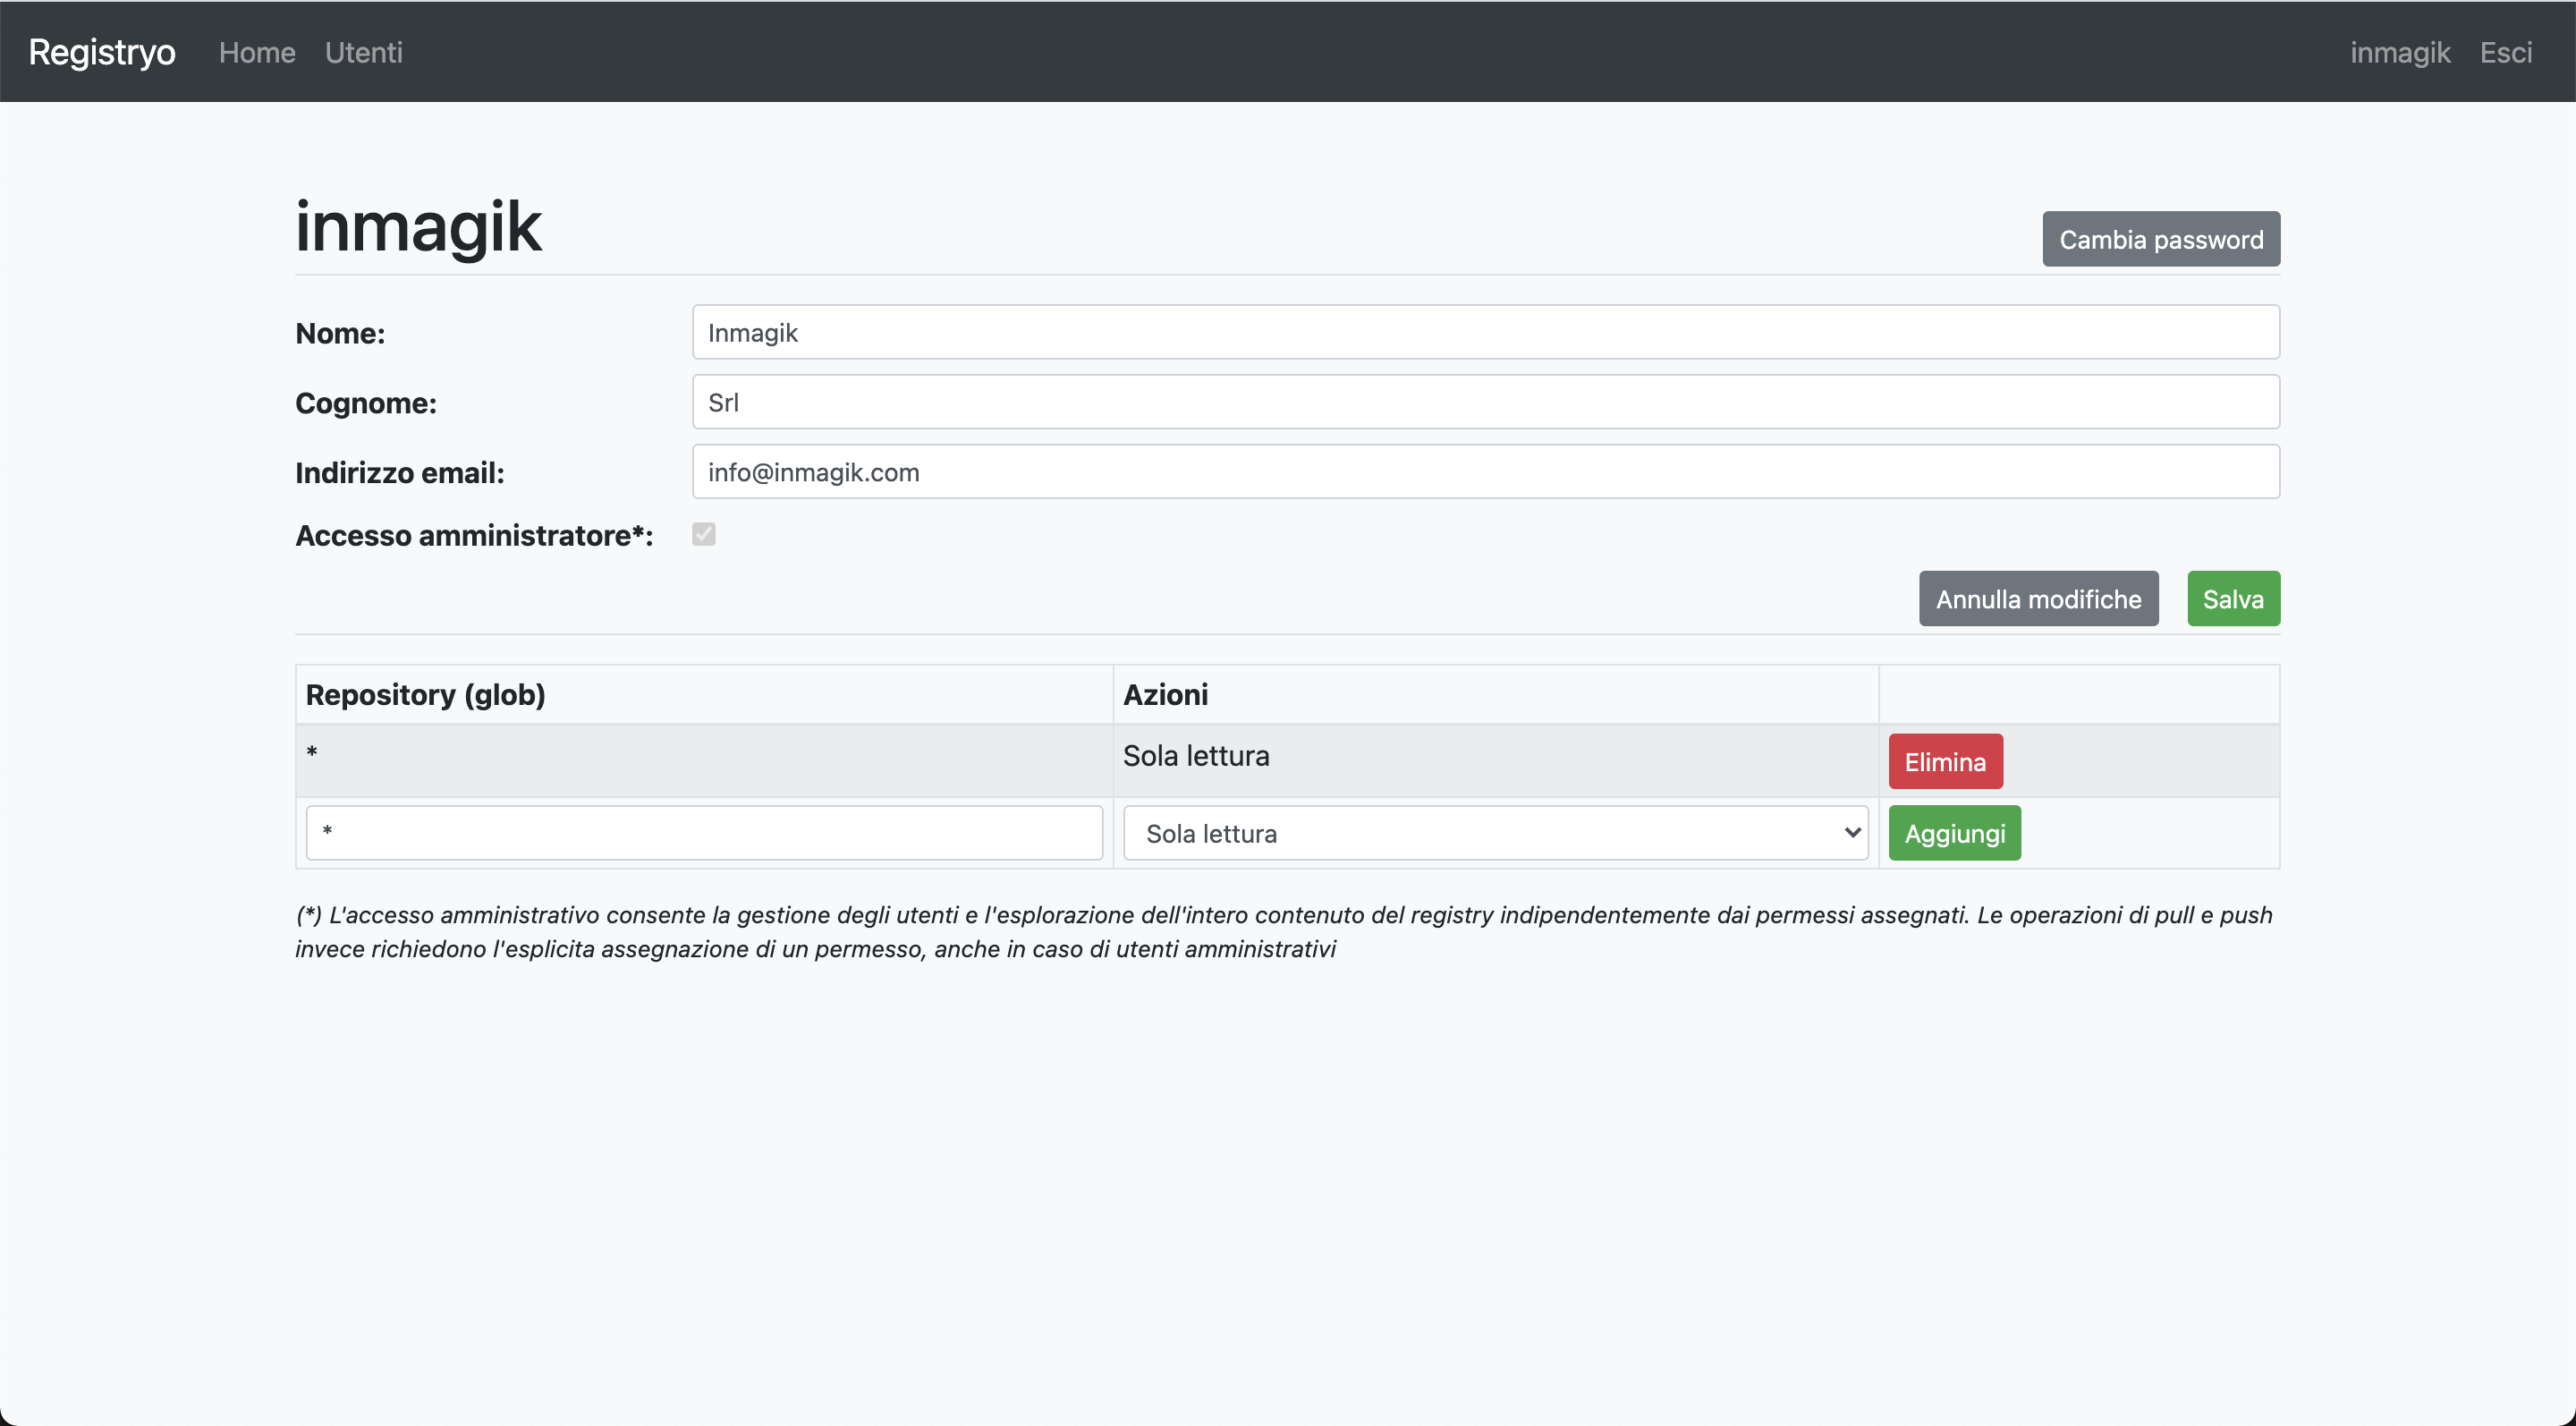
This tools allows to create user accounts and to manage associated permissions to access different repositories in the registry. The permission model is based on an Access Control List: the administrator can assign each user pull and/or push authorization for a repository (or a set of repositories, using glob patterns matched against their name). Rules can be setup to allow a user to pull everything or push everything (or even both). Usually, service users (those used for deployments) have only pull rights, while developers have both. push only access it proveded for accounts that are not used by humans but from automatic build tools (which have no interest in pulling). Furthermore, each user can also be elected as admin.
It is possible to create users both for humans and for machines, all you need to do so is a username and password pair. Then you can provide other information such as first name, last name or email address to enable other features (explained later), but that's up to you.
Every user can access the UI. Admin users see the full registry content, the list of all users and their permission, and have write rights. Non admin users see the list of the repository they can pull (with all the details about tags and manifests), and their user profile (where they can change their password)
The platform also integrates an email based password recovery flow. If a SMTP server is given, each user can request a password reset link to be delivered to their mailbox. It should be clear that this works only for users that have an email address associated to their account.
Authentication server
When you deploy the docker registry, you can configure it so that it accepts tokens signed by our tool basing on the configured permissions. Once configured by the infrastructure administrator, every user will be able to docker login into the registry and pull and push images according to their rights. The emission of tokens is fully automatic and the integration with the docker cli is seamless.
How do I use it?
Well, it is very very simple. Head on to the GitHub repository: you'll find an example configuration for both the registry and the authentication tool to work together, and an example docker-compose.yml to get things up and running quickly. If you follow the provided step by step instructions, you'll be done in minutes. Pay attention to setup correct DNS names wherever required (in the example we use fake names).
Contributions
Contributions are always welcome, both for translation of the interface and improvements to the code. Just open a pull request or drop us a line, we are always happy to have feedbacks or comments. You can also find us on facebook and twitter. If you liked this article, please let us know!
Premium support
We can also offer premium support in deploying and configuring the registry ui and authentication system, so feel free to contact us at info(at)inmagik.com.
See you!